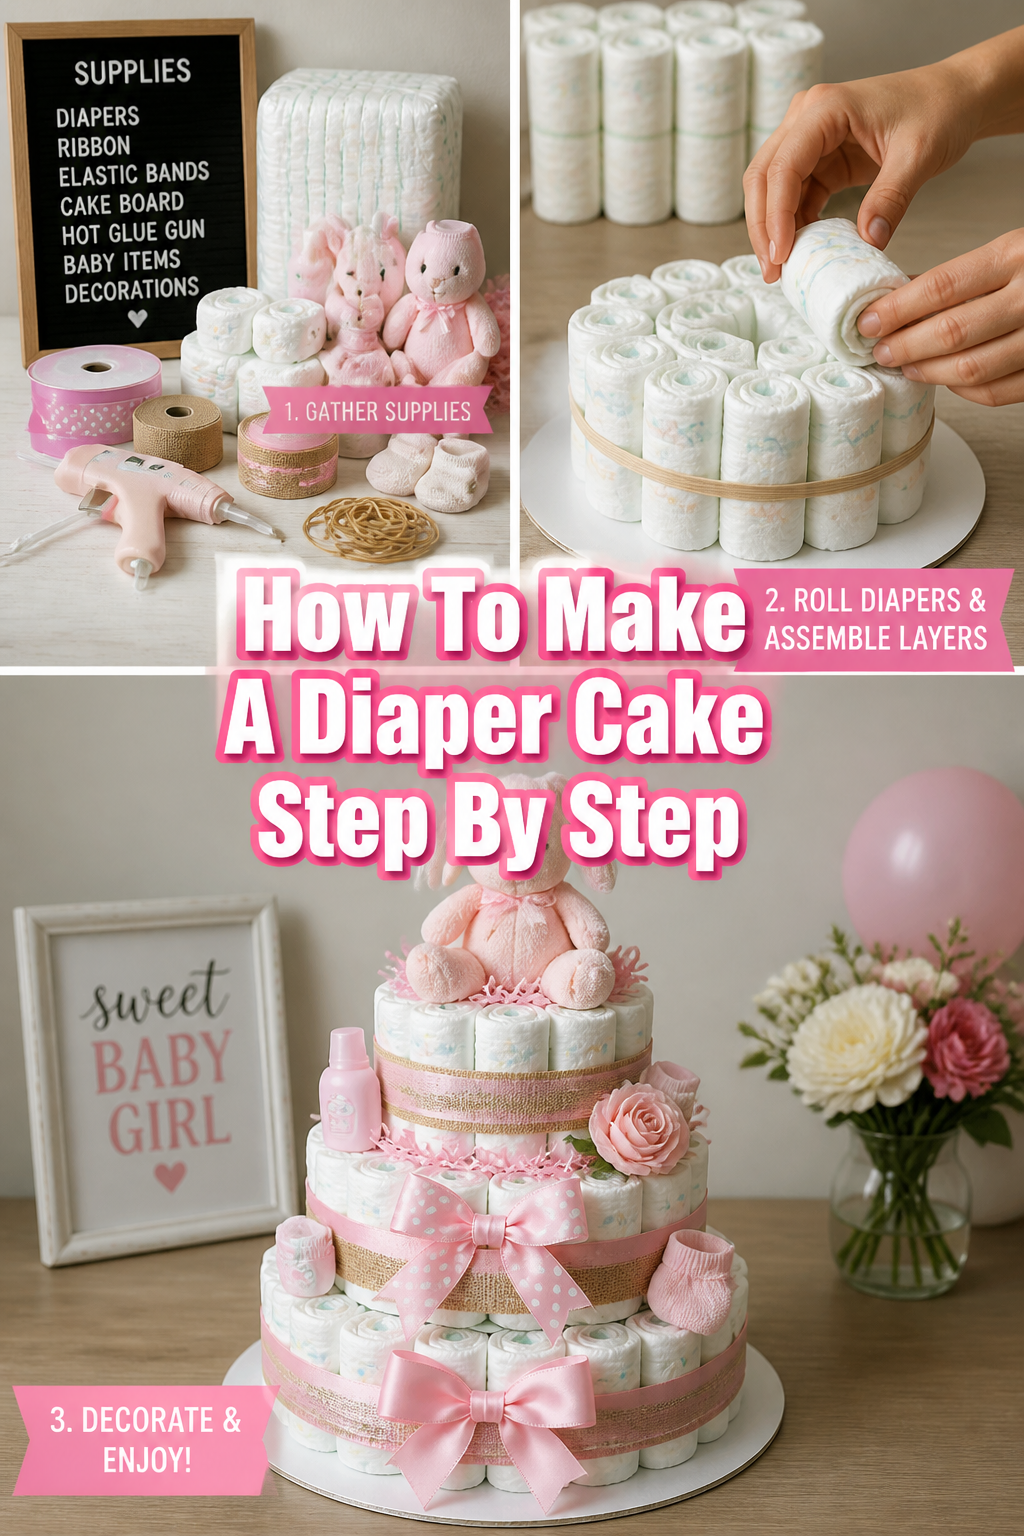
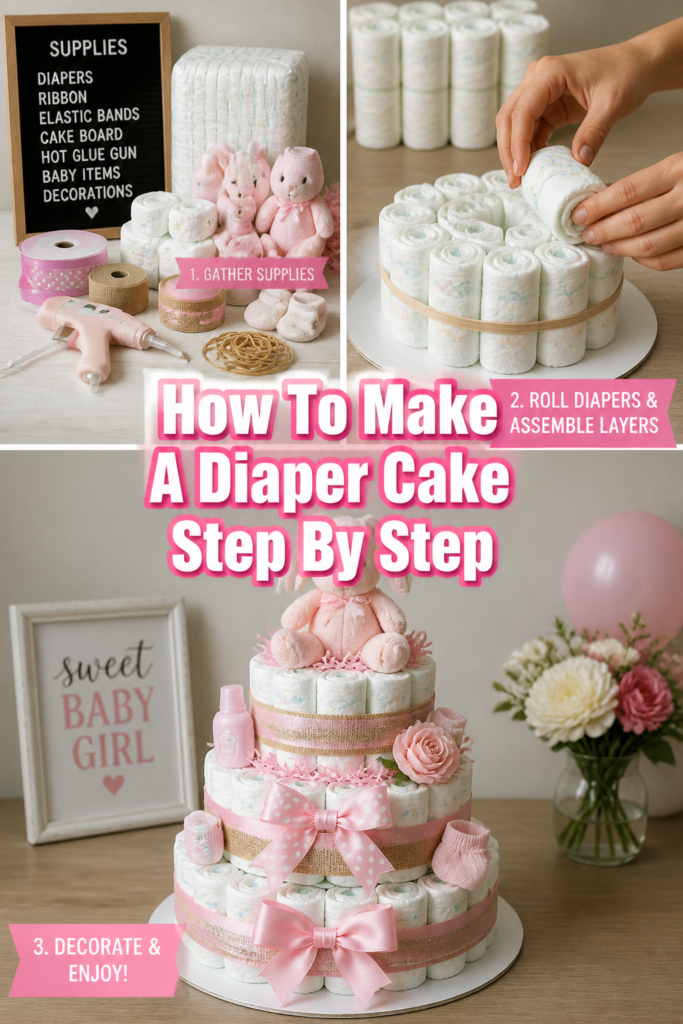
🎂 How To Make A Diaper Cake Step By Step
🍼 The Newborn Survival Kit
The first six months of parenthood are a blur of exhaustion. Stop trying to tough it out—these are the 5 absolute life-saving baby essentials that experienced moms literally refuse to live without. They will instantly solve your biggest sleeping, feeding, and soothing struggles.
🌙 Hatch Rest Baby Sound Machine
The ultimate sleep hack. You can entirely control this white noise machine and dimmable nightlight from your smartphone, meaning you never have to accidentally wake the baby while sneaking back out of the nursery after a 3 AM feeding.
🤧 FridaBaby NoseFrida Snotsucker
It sounds incredibly gross until your baby has their first cold and literally cannot breathe to sleep. Throw away those useless hospital bulb syringes—this doctor-invented tool safely clears congestion in seconds, and yes, the filter absolutely prevents any germs from reaching you.
💧 Haakaa Silicone Manual Breast Pump
Every breastfeeding mom's best kept secret. Simply suction this cheap, cord-free silicone cup to the opposite breast while you nurse to effortlessly catch every drop of liquid gold letdown that would otherwise leak onto your shirt and be totally wasted.
🧴 Aquaphor Baby Healing Ointment
Forget buying ten different expensive, highly-fragranced creams. This is the only ointment you need. It miraculously cures severe diaper rash overnight, heals cracked nursing nipples, soothes baby eczema, and aggressively protects delicate skin from harsh winter wind.
☁️ Burt's Bees 100% Organic Burp Cloths
You will go through dozens of these a day, so do not cheap out on thin fabric. These thick, ultra-absorbent organic cotton cloths actually catch massive spit-ups before they ruin your only clean outfit, while remaining incredibly soft against your newborn's face.
Oh, mama, remember that feeling of wanting to give the perfect, heartfelt gift at a baby shower? Something that truly stands out?
I’ve been there, racking my brain for something both practical and super cute. That’s how I stumbled upon the magic of diaper cakes, and let me tell you, they’re a total hit!
I’ve whipped up more than a few of these beauties over the years for friends, family, and even as centerpieces for my own kids’ first birthdays. Trust me, if I can do it with a toddler clinging to my leg, you absolutely can too!
Quick Overview
You’re about to create a stunning, practical gift that will wow any new parent. It’s a centerpiece, a gift, and a stash of essentials all rolled into one!
- Time needed: 1-2 hours (depending on how elaborate you get!)
- Difficulty: Beginner
- What you’ll need: Diapers, rubber bands, a central support (like a paper towel roll), ribbon, small baby items, and a cake base.
Step-by-Step Instructions
Step 1: Gather Your Diaper Stash
First things first, you’ll need a good supply of diapers. Around 60-70 newborn or size 1 diapers usually make a lovely three-tier cake.
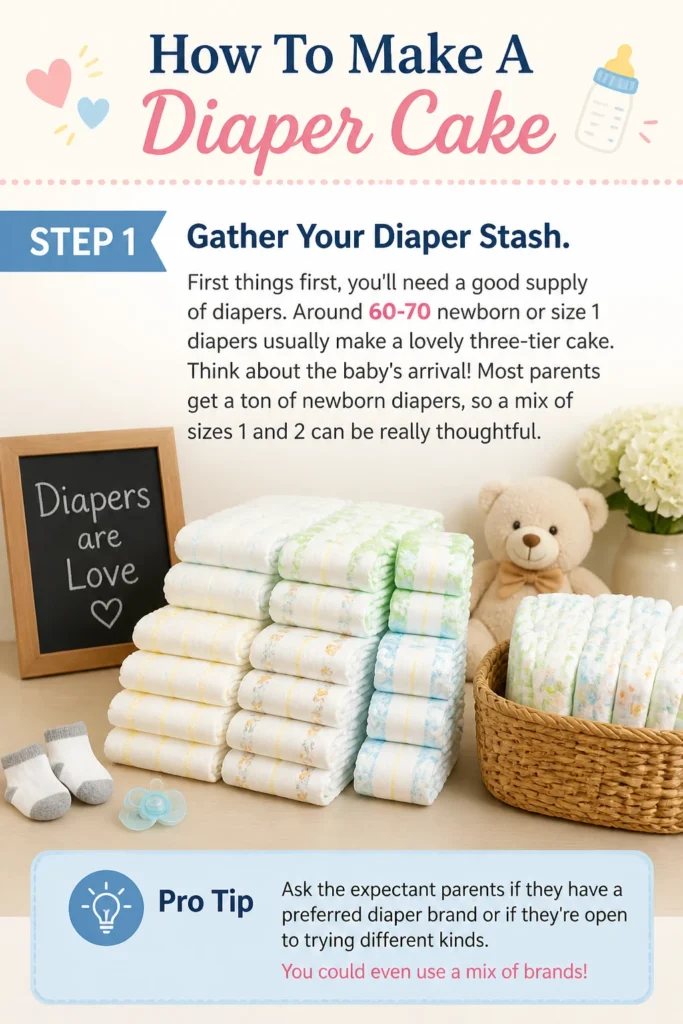
Think about the baby’s arrival! Most parents get a ton of newborn diapers, so a mix of sizes 1 and 2 can be really thoughtful.
Pro Tip: Ask the expectant parents if they have a preferred diaper brand or if they’re open to trying different kinds. You could even use a mix of brands!
Step 2: Roll Each Diaper
This is where the magic begins! Take one diaper and lay it flat.
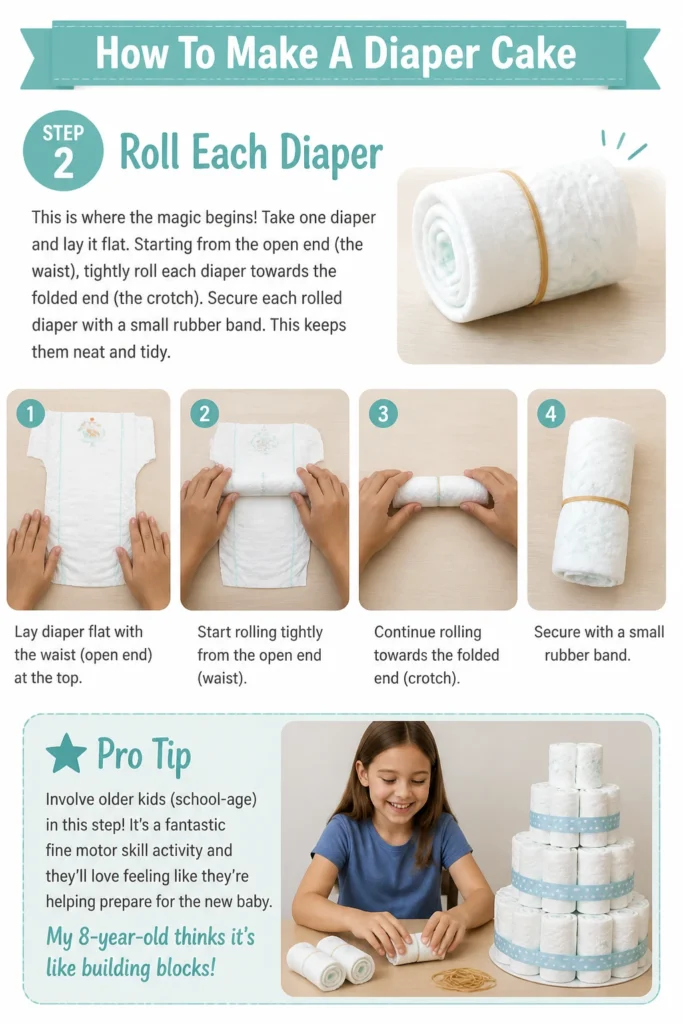
Starting from the open end (the waist), tightly roll each diaper towards the folded end (the crotch).
Secure each rolled diaper with a small rubber band. This keeps them neat and tidy.
Pro Tip: Involve older kids (school-age) in this step! It’s a fantastic fine motor skill activity and they’ll love feeling like they’re helping prepare for the new baby. My 8-year-old thinks it’s like building blocks!
Step 3: Build Your Base Tier
Grab a sturdy cardboard cake round or even a decorative platter for your base. This will give your diaper cake stability.
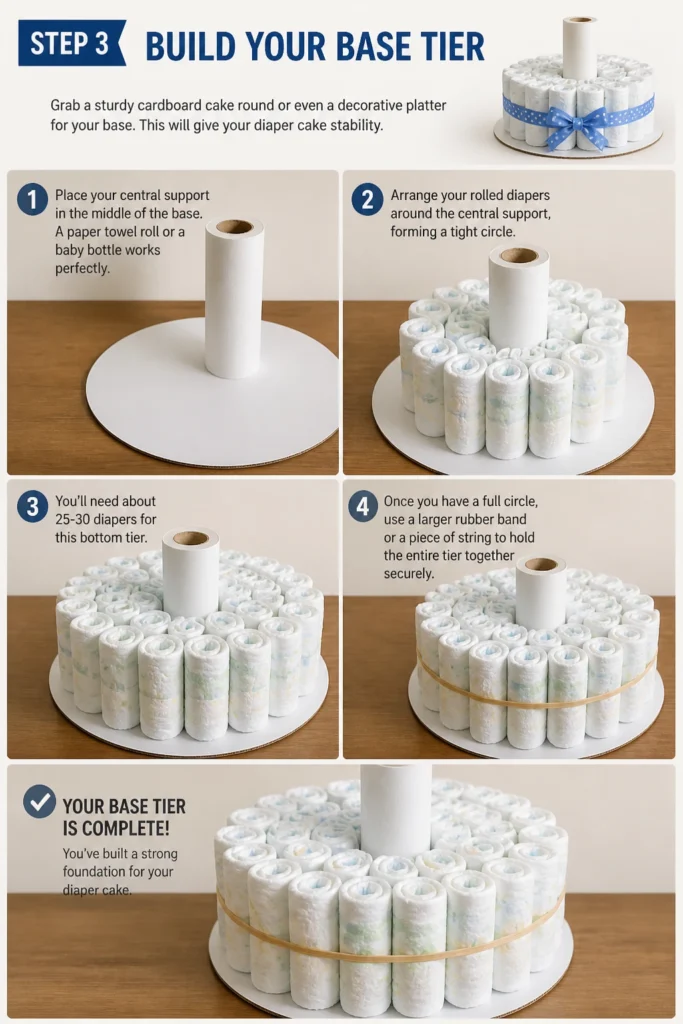
Place your central support in the middle of the base. A paper towel roll or a baby bottle works perfectly.
Arrange your rolled diapers around the central support, forming a tight circle. You’ll need about 25-30 diapers for this bottom tier.
Once you have a full circle, use a larger rubber band or a piece of string to hold the entire tier together securely.
Step 4: Create the Middle Tier
Now, let’s move up! For the middle tier, you’ll need fewer diapers – around 20-25.
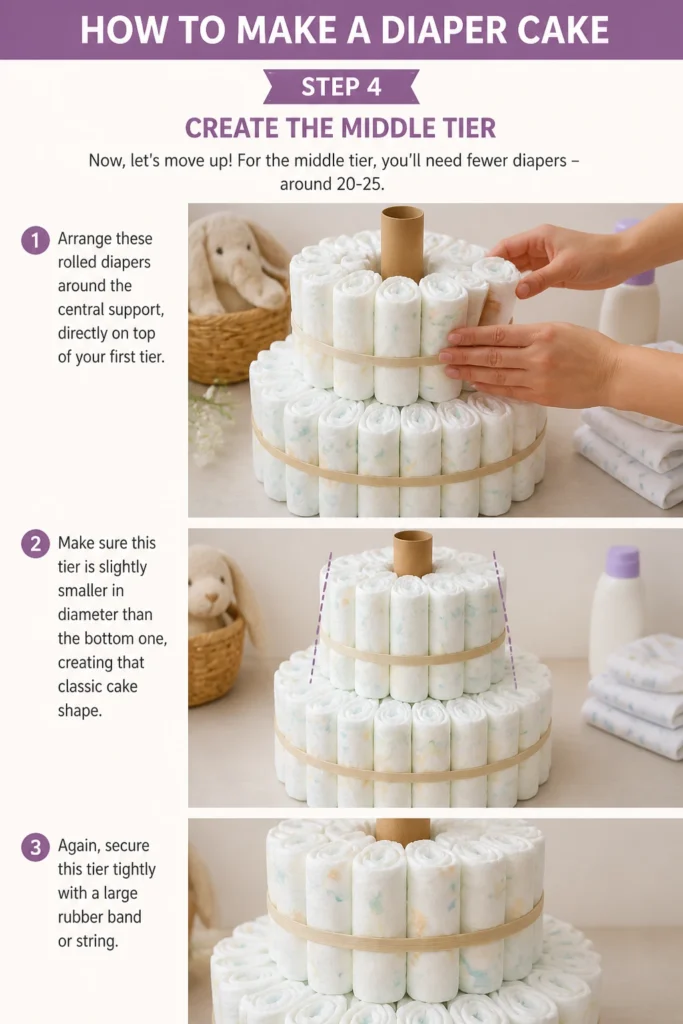
Arrange these rolled diapers around the central support, directly on top of your first tier.
Make sure this tier is slightly smaller in diameter than the bottom one, creating that classic cake shape.
Again, secure this tier tightly with a large rubber band or string.
Step 5: Assemble the Top Tier
The smallest tier typically uses about 10-15 diapers. This will sit charmingly at the very top.
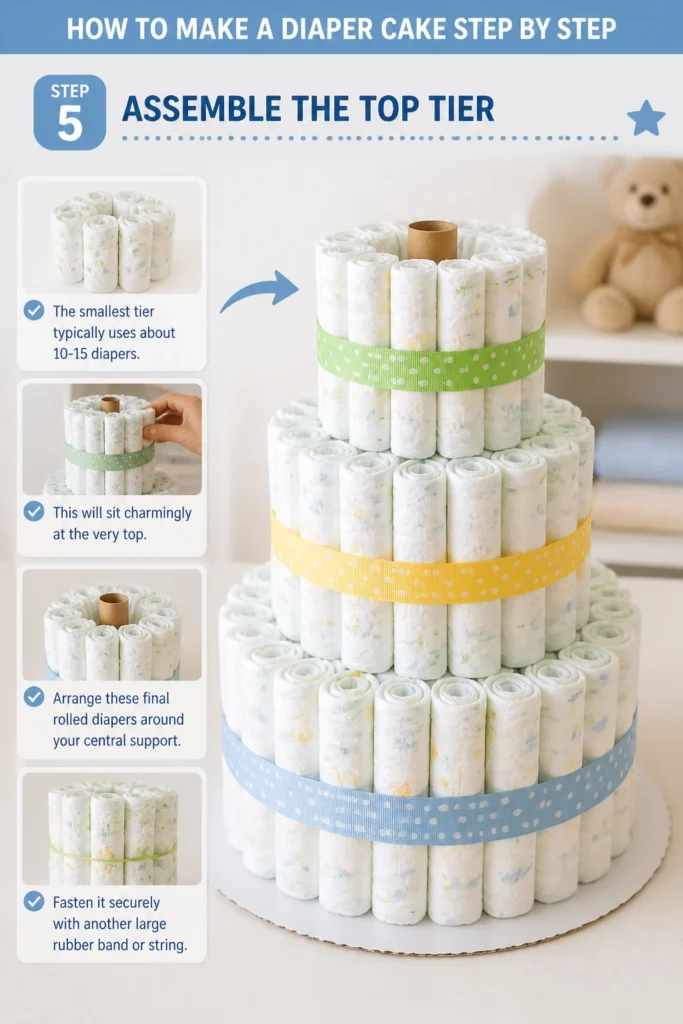
Arrange these final rolled diapers around your central support.
Ensure it’s the smallest tier, completing the cake’s tiered look.
Fasten it securely with another large rubber band or string.
Step 6: Decorate with Ribbon
Time to hide those rubber bands and add some flair! Choose ribbons that match the baby shower theme or nursery colors.
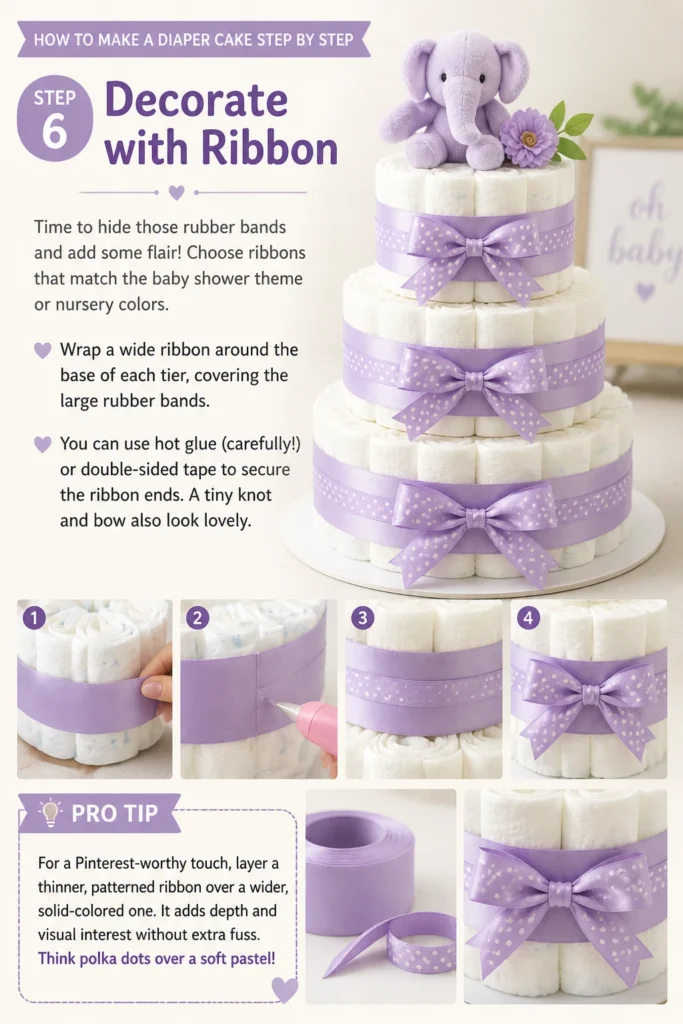
Wrap a wide ribbon around the base of each tier, covering the large rubber bands.
You can use hot glue (carefully!) or double-sided tape to secure the ribbon ends. A tiny knot and bow also look lovely.
Pro Tip: For a Pinterest-worthy touch, layer a thinner, patterned ribbon over a wider, solid-colored one. It adds depth and visual interest without extra fuss. Think polka dots over a soft pastel!
Step 7: Tuck in the Goodies
This is where the “gift” part really shines! Diaper cakes aren’t just for show; they’re packed with practical treasures.
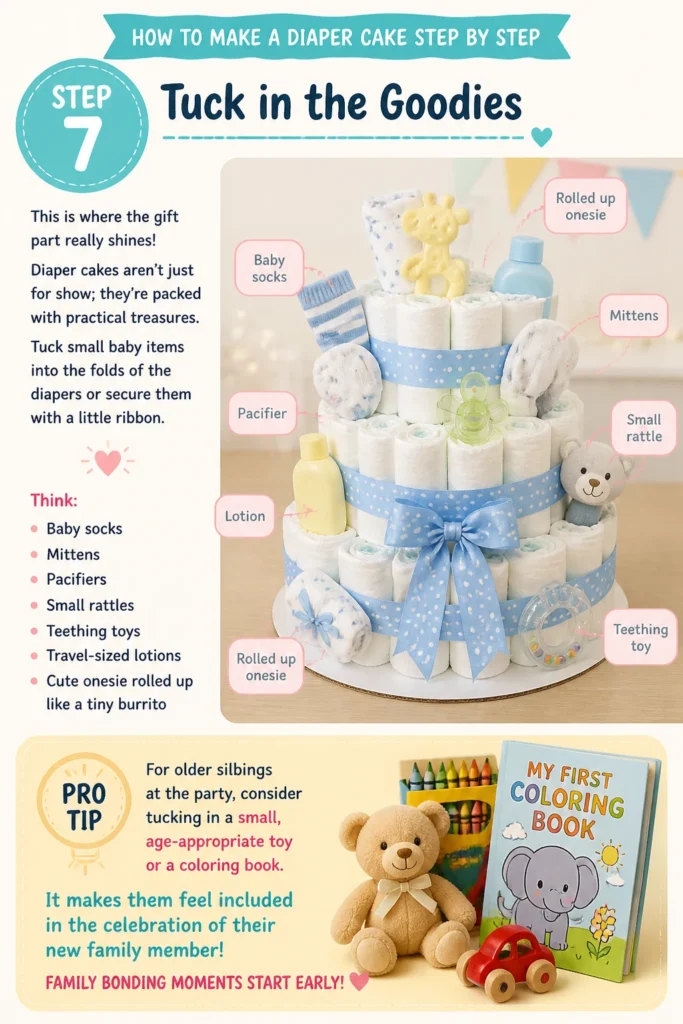
Tuck small baby items into the folds of the diapers or secure them with a little ribbon.
Think baby socks, mittens, pacifiers, small rattles, teething toys, travel-sized lotions, or even a cute onesie rolled up like a tiny burrito.
Pro Tip: For older siblings at the party, consider tucking in a small, age-appropriate toy or a coloring book. It makes them feel included in the celebration of their new family member! Family bonding moments start early!
Step 8: Add the Topper and Finishing Touches
Every cake needs a topper! A cute plush toy, a pair of baby booties, or a personalized sign makes a perfect finish.
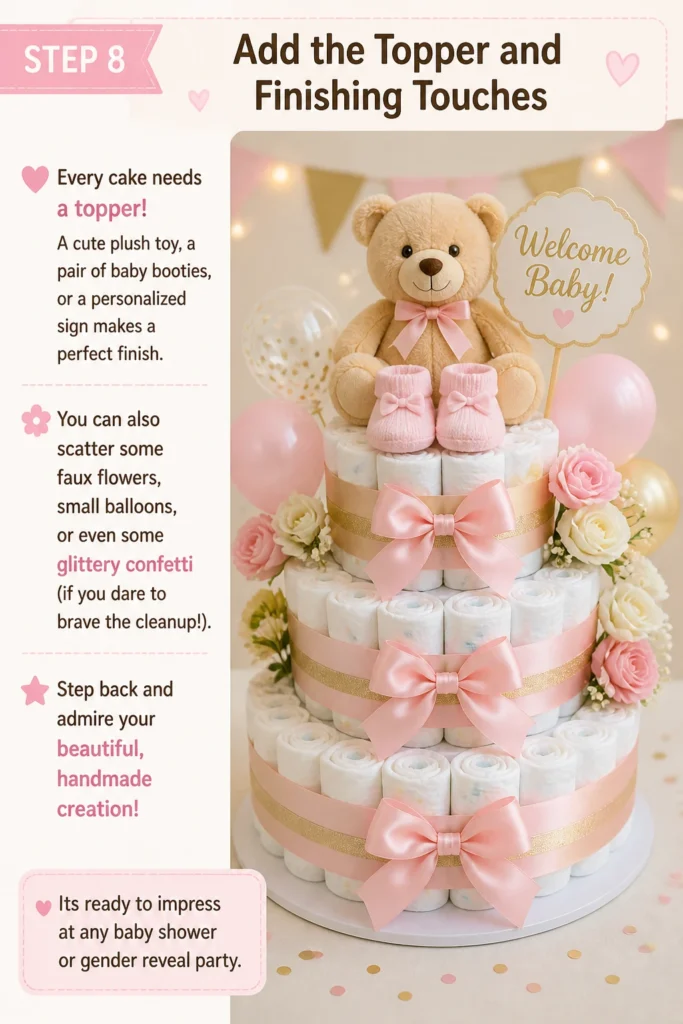
You can also scatter some faux flowers, small balloons, or even some glittery confetti (if you dare to brave the cleanup!).
Step back and admire your beautiful, handmade creation! It’s ready to impress at any baby shower or gender reveal party.
Common Mistakes to Avoid
Using Too Few Diapers
One common pitfall is not using enough diapers, especially for the lower tiers. This can make your cake look sparse and unstable.
Always err on the side of having a few extra diapers on hand. You want those tiers to be full and firm, like a real cake.
Not Securing Tiers Tightly Enough
A wobbly diaper cake is a sad diaper cake! If your rubber bands or string aren’t tight enough, your tiers can sag or even fall apart.
Make sure each tier feels very firm and secure before moving on to the next step. Give it a gentle wiggle test!
Over-Decorating
While it’s fun to add all the cute baby things, sometimes less is more. An overly cluttered diaper cake can lose its elegance.
Choose a few key items to highlight, like a sweet plush toy or a lovely ribbon, and let the diapers themselves be the star.
Ignoring Diaper Size
Using only newborn diapers might seem logical, but babies grow fast! Many parents end up with an excess of newborn sizes.
Consider mixing in some size 1 or 2 diapers, or even making the bottom tier larger sizes. It’s a thoughtful, practical touch that parents will truly appreciate later on.
Troubleshooting
My Diaper Cake is Leaning!
If your cake starts to tilt, it usually means your central support isn’t strong enough or the tiers aren’t evenly stacked.
Ensure your central paper towel roll or bottle is firmly in place and that each subsequent tier is centered directly above the one below it. You might need to gently adjust and re-tighten the large rubber bands around the tiers.
The Diapers Keep Unrolling!
This happens if the individual rubber bands aren’t tight enough, or if the initial roll wasn’t firm. Don’t worry, it’s fixable!
Simply re-roll any rogue diapers more tightly and ensure the small rubber band is snug around them. A tighter roll makes for a sturdier cake.
I Don’t Have Enough Diapers for All the Tiers!
Oops! It’s easy to miscalculate. If you find yourself short, you have a couple of options.
You can make a two-tier cake instead of three, which is still absolutely adorable. Alternatively, you can use a smaller number of diapers for the top tier and fill any gaps with extra baby items or rolled-up receiving blankets.
Key Takeaways
- Start with a strong foundation: A sturdy base and central support are crucial for stability.
- Roll diapers tightly: Individual tight rolls make for firm, even tiers.
- Secure each tier firmly: Large rubber bands or string keep your cake from wobbling.
- Personalize with thoughtful goodies: Tuck in practical baby items that new parents will genuinely use.
- Don’t overcomplicate: Simple elegance often makes the biggest impression.
- Have fun with it! This is a gift from the heart, so enjoy the creative process.
Frequently Asked Questions
Can I make a diaper cake without rolling each diaper?
While rolling each diaper individually creates that classic, polished “cake” look and makes it very stable, you can also stack them differently. Some people stand diapers upright in a circle, but this usually requires more external support and can be less stable. Rolling is truly the easiest and prettiest method.
What if I don’t have a paper towel roll for the center?
No problem at all! A baby bottle, a tall baby shampoo bottle, or even a sturdy cardboard tube from a wrapping paper roll cut to size can work perfectly as a central support. Just make sure it’s stable and tall enough for your desired cake height.
How far in advance can I make a diaper cake?
Diapers don’t expire, so you can make a diaper cake several weeks in advance if you wish! Just keep it stored in a clean, dry place, perhaps covered loosely with a clear plastic bag or cellophane, to keep it dust-free until the big day. This is a great craft for when you have a quiet evening or a free afternoon!
Can I customize the diaper cake for a specific theme?
Absolutely, that’s part of the fun! For a “Twinkle Twinkle Little Star” theme, use navy and silver ribbons and tuck in star-shaped rattles. For a “Wild One” or jungle theme, incorporate animal print ribbons and small safari animal toys. The possibilities are endless, making it perfect for any party idea!
Our Top Recommended Finds
- Clear Rubber Bands (various sizes): Essential for securing individual diapers and full tiers without being visible.
- Wide Grosgrain Ribbon Assortment: Great for covering those rubber bands and adding a pop of color or texture. They’re easy to work with and look elegant.
- Sturdy Cardboard Cake Boards: These provide a solid, flat base for your diaper cake, making it easy to transport and display.
Crafting Joy, One Diaper at a Time
There you have it, mama! You’ve just learned how to create a beautiful, practical, and utterly charming diaper cake. It’s more than just diapers; it’s a testament to your thoughtfulness and creativity, perfect for celebrating new life.
Think of all the joy this will bring to the expectant parents, and how much they’ll appreciate the useful gifts tucked inside. It’s a true labor of love, and so worth the effort.
So, grab those diapers, pick out some adorable ribbons, and let your creativity shine! You’ve got this, and the next baby shower will be all the more special because of your personal touch.